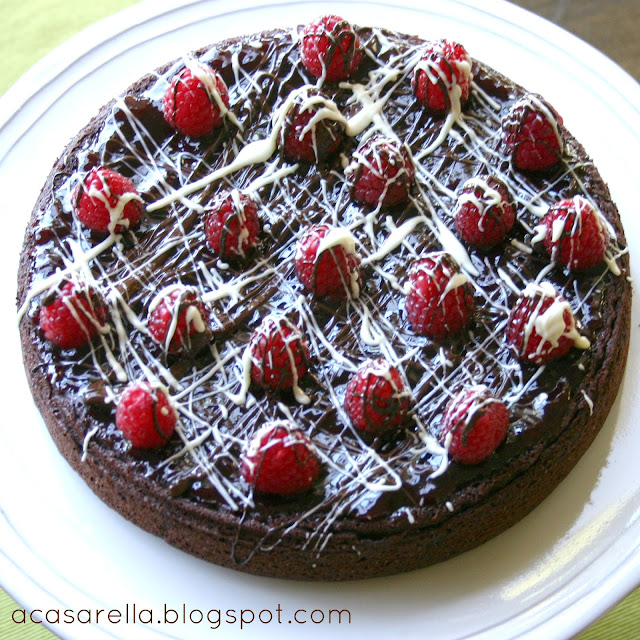
Today I'm taking a little break from my "Top Ten Things That Make Me Happy" series to bring you a favorite recipe: Raspberry Brownie Cake.
Come to think of it, it probably could make my top ten things list. We all know how much I love berries and chocolate. (Seen here and here.)
And when you see how ridiculously easy this cake is to make AND how unbelievably beautiful it turns out, it will probably make your top ten list as well.
You're welcome.
It's been awhile since I've done a full-on tutorial. That's probably because I've been doing a lot of Pinterest-inspired projects and many of them come with their own tutorials. No point in reinventing the wheel.
This recipe, however, came from my mother-in-law. I think she clipped it from a newspaper. (That's becoming kind of a quaint concept, isn't it?) Anyway, the recipe is so easy that I don't even have it written down anywhere. You probably won't need one either.
Again, you're welcome.
So let's get down to business, shall we?
All you're going to need to make the beautiful cake pictured above is what you see below. That is:
- A box of brownie mix. I have always used Duncan Hines Chewy Fudge. I'm sure any type would do. You'll need to prepare the brownies as directed on the package which means you'll need:
- Oil
- Water
- Eggs (if the recipe has a "cake-like vs. chewy" option, opt for cake-like. That usually means an extra egg.) For the topping you will need:
- Seedless raspberry jam
- Fresh raspberries
- A small bar each of white and dark chocolate
 |
| Note the water spots on my fridge. I like to keep it real here at `a casarella. |
Begin by preparing the brownies as directed on the package. (Reminder: use the cake-like option if there is one.)
For this recipe you're going to need a springform pan. I know, I know, a lot of you don't have one. I borrowed one the first time I made it. (Then I went out and got my own. It's eight-and-a-half inches in diameter.)
For some reason I always sift my boxed mixes. I just think it helps avoid powdery lumps. If you don't have OCD you can probably skip this part.
Add your wet ingredients (you will find the amounts on the box).
Even though my spring form pan is non stick, I give it a shot of cooking spray. You want the cake to emerge from the pan unscathed.
Pour mix in spring-form.

Check your box for cooking times. It is important that you don't overcook the cake or the edges will be rock hard. I followed the 9"x9" directions using the recommended temperature for dark or non-stick pans (325 degrees).
I actually set my timer for a few minutes before the minimum recommended time of 34 minutes and I ended up removing it at that 30 minute mark.
My mama always taught me to clean up as I go along so I try to that while the cake is baking and/or cooling. Are you a "clean-up-along-the-way" type or a "do-it-all-at-the-end" type?
When the cake emerges, let it cool.

Then you're going to want to run a knife along the perimeter to help it release from the pan smoothly. (If you used cooking spray this is barely necessary but, well, you know, the OCD and all...)
Ahhh... a perfect release!

The next step is to flip the cake over...
...and remove the bottom of the springform.
This leaves you with a nice flat (albeit somewhat patterned) surface to work with.
Then gather up your toppings.
Place a dollop of jam on the cake and start "frosting."
You'll want to start with the brown chocolate.
You're going to be drizzling this over the cake and sometimes, if the chocolate is too thick, I add a drop or two of oil to thin it out. This makes for easier drizzling.
My drizzling technique is kind of primitive. I get some chocolate on the tines of a fork and fling them back and forth over the cake in different directions.
Repeat the process with the white chocolate. If you do the white first the brown covers it up and makes it less visible.
As you can see, I'm not the best drizzler/flinger. The white chocolate always ends up with some blobby-looking parts.
The beauty of this cake is that no one but you will notice the blobs.
Everyone else will be so busy complimenting your baking prowess and wondering how you made such a beautiful confection that they won't even see the blobs.
Again, you're welcome.
:)
2016 UPDATE: Want an even EASIER version of this dessert?
Check out my Raspberry Brownie Bites. Click HERE for more details!


